Sonido Software offers an integration with Zoom to automate the process of adding Zoom links to bookings made within Sonido. This guide will walk through the setup and use of the Zoom Integration with Sonido Software.
SETUP
To get started with the setup of the Zoom integration for Sonido Software, you will need to be logged into your Zoom account that you would like to use for the integration - only one user will need to complete the Zoom Integration setup. The Zoom account that is connected to Sonido will be used for automating the creation of Zoom links for Sonido calendar bookings. It is recommended to use a general company Zoom account or an Admin user Zoom account for the bookings.
If you do not have a Zoom account or would like to create a new one, be sure to create the appropriate account within Zoom before beginning this setup.
ZOOM SETUP
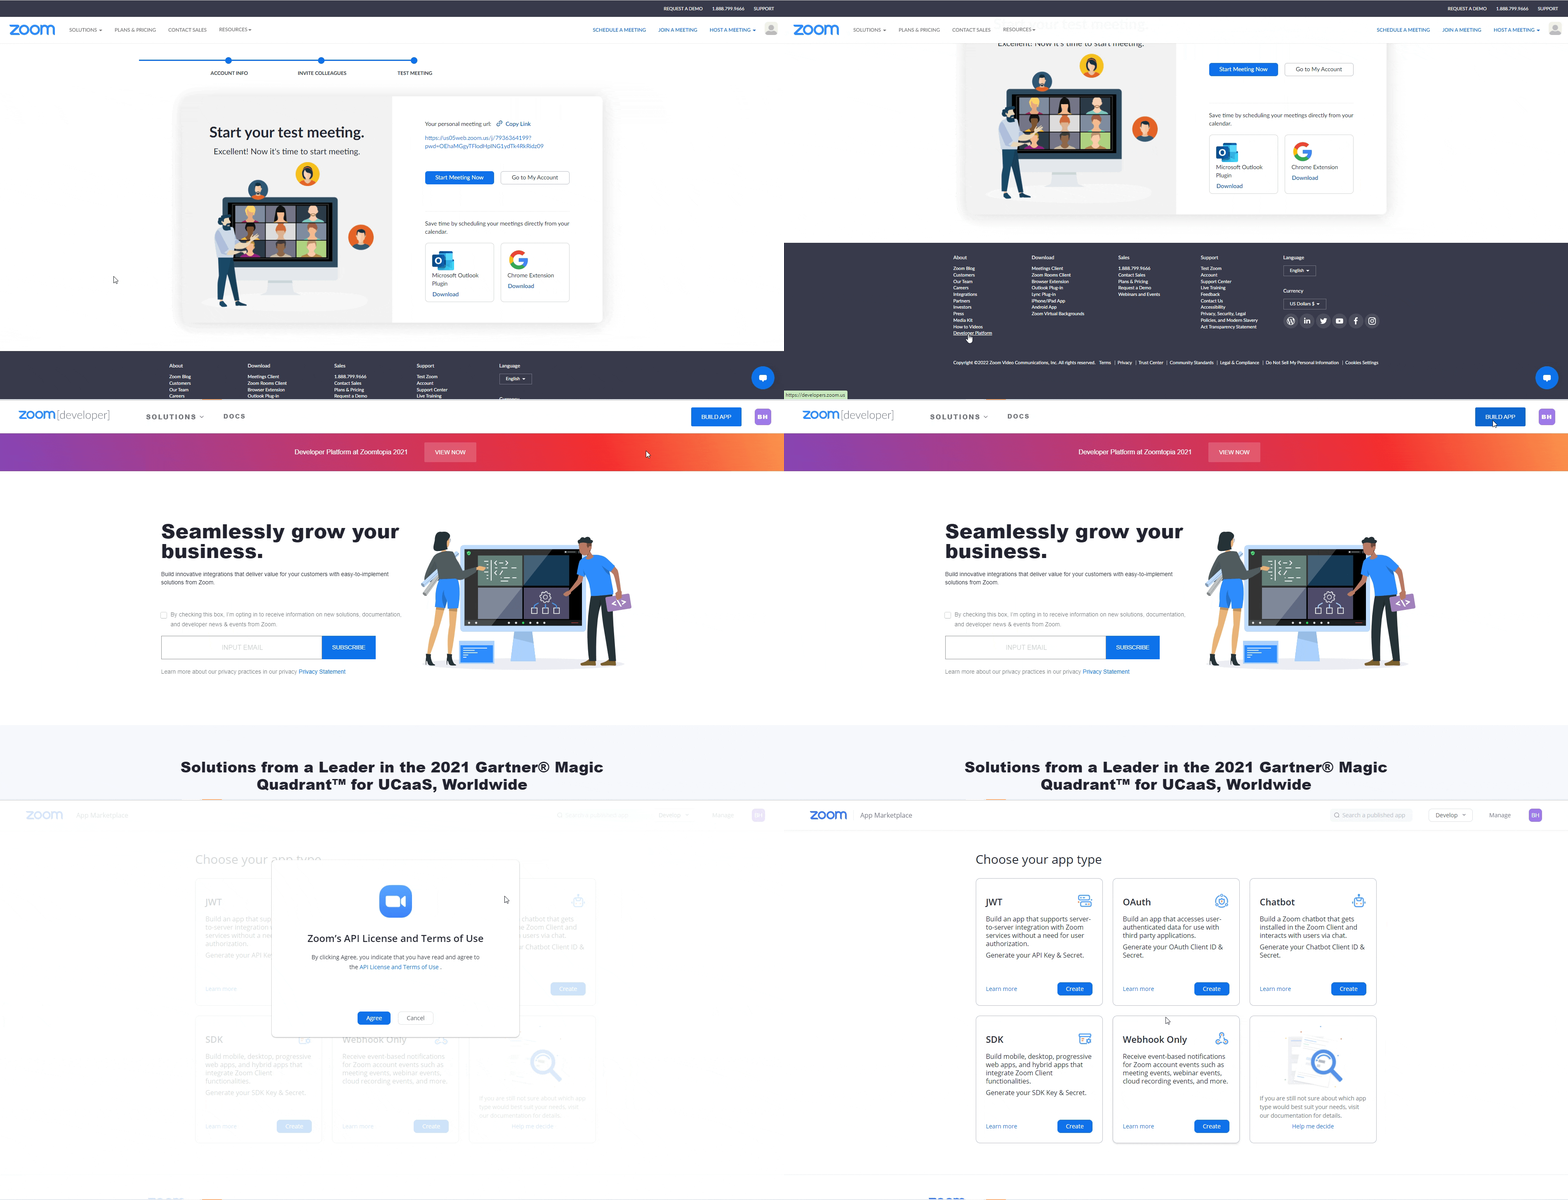
Once logged into the appropriate Zoom account, you will need to access the Developer Settings within Zoom. In the footer of your Zoom account, select "Developer Platform" and then select the blue button at the top of the screen to "Build App."
You will see a dialog to accept the Zoom Terms and Conditions, which will need to be accepted in order to move forward.

Next, you will see a screen where you may select your app type. For the Sonido Software integration with Zoom, we will use the JWT app integration. You may select the Create button.

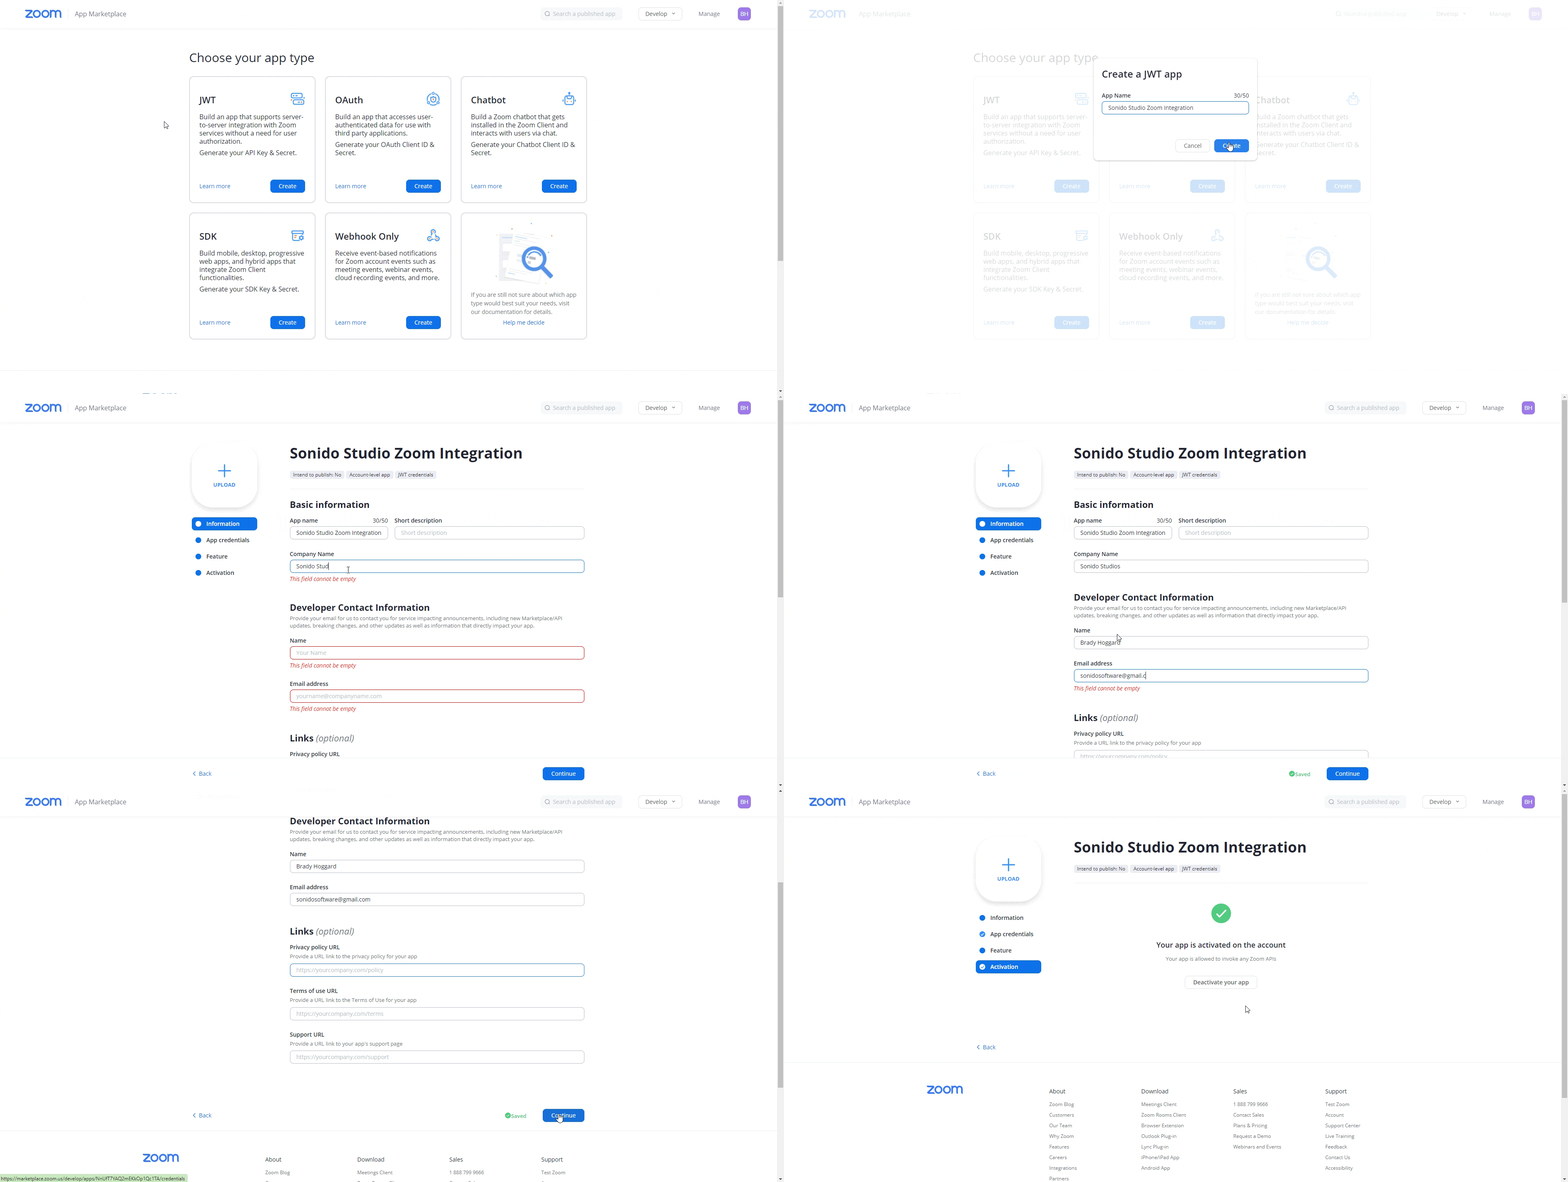
After selecting the "Create" button for the JWT app integration setup, you will begin filling out some basic information necessary to build the app - don't worry, you don't have to code anything.
Give your app a name and select "Create".
Then, fill out the basic information in the next screen, such as your company name, a primary contact name and email address. Once you've provided all these details, select the "Continue" button on the bottom of the screen.
The next dialog will display the App Credentials. You may copy these credentials now, or you can access them later; you will need them to paste into the Sonido Software settings to connect Zoom. After getting to this point and pressing "Continue", you should be finished for a moment.

CONNECTING ZOOM TO SONIDO SOFTWARE
The next step is to connect the Zoom app to Sonido Software using the Zoom app credentials that were created.
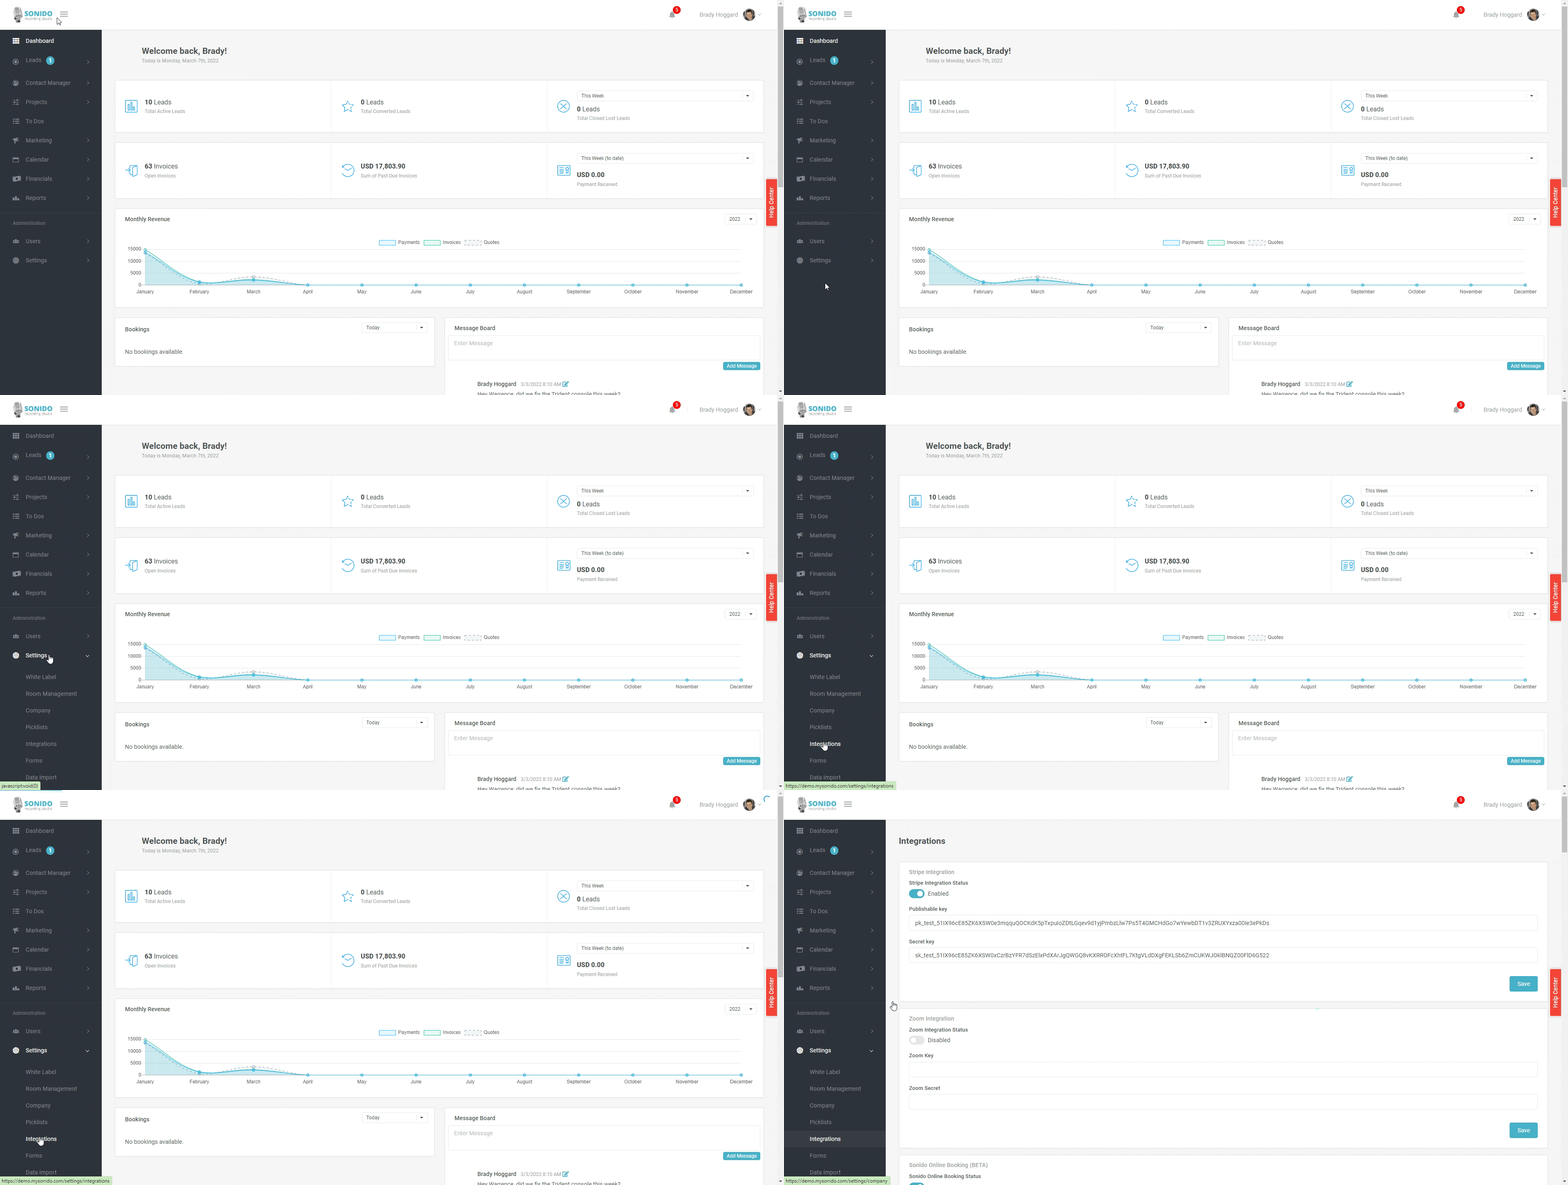
First, within Sonido select the "Settings" option in the main menu, then select "Integrations."

We will paste the Zoom app credentials provided into the appropriate fields for the Zoom Integration within Sonido. You will find this under the "App Credentials" tab within the Zoom App Marketplace; if you closed or left the screen within Zoom after setting up the JWT app, you will need to navigate back to the integration setup screen using the steps indicated above and then select the "View Here" link under the JWT app block.

You will first copy the "API Key" from the Zoom JWT app settings and paste that character string into the "Zoom Key" field within your Sonido account under the Zoom Integration settings. Then, copy the "API Secret" from the Zoom JWT app settings and paste that character string into the "Zoom Secret" field within your Sonido account under the Zoom Integration settings.
Once you have copied and pasted both keys from Zoom into Sonido, press the "Save" button to save the update.

Then, in the Sonido settings, change the "Zoom Integration Status" field toggle to "On" and scroll to the very bottom of the settings page and press "Save".

You have now successfully integrated Zoom into your Sonido account!
ZOOM LINKS IN CALENDAR BOOKINGS
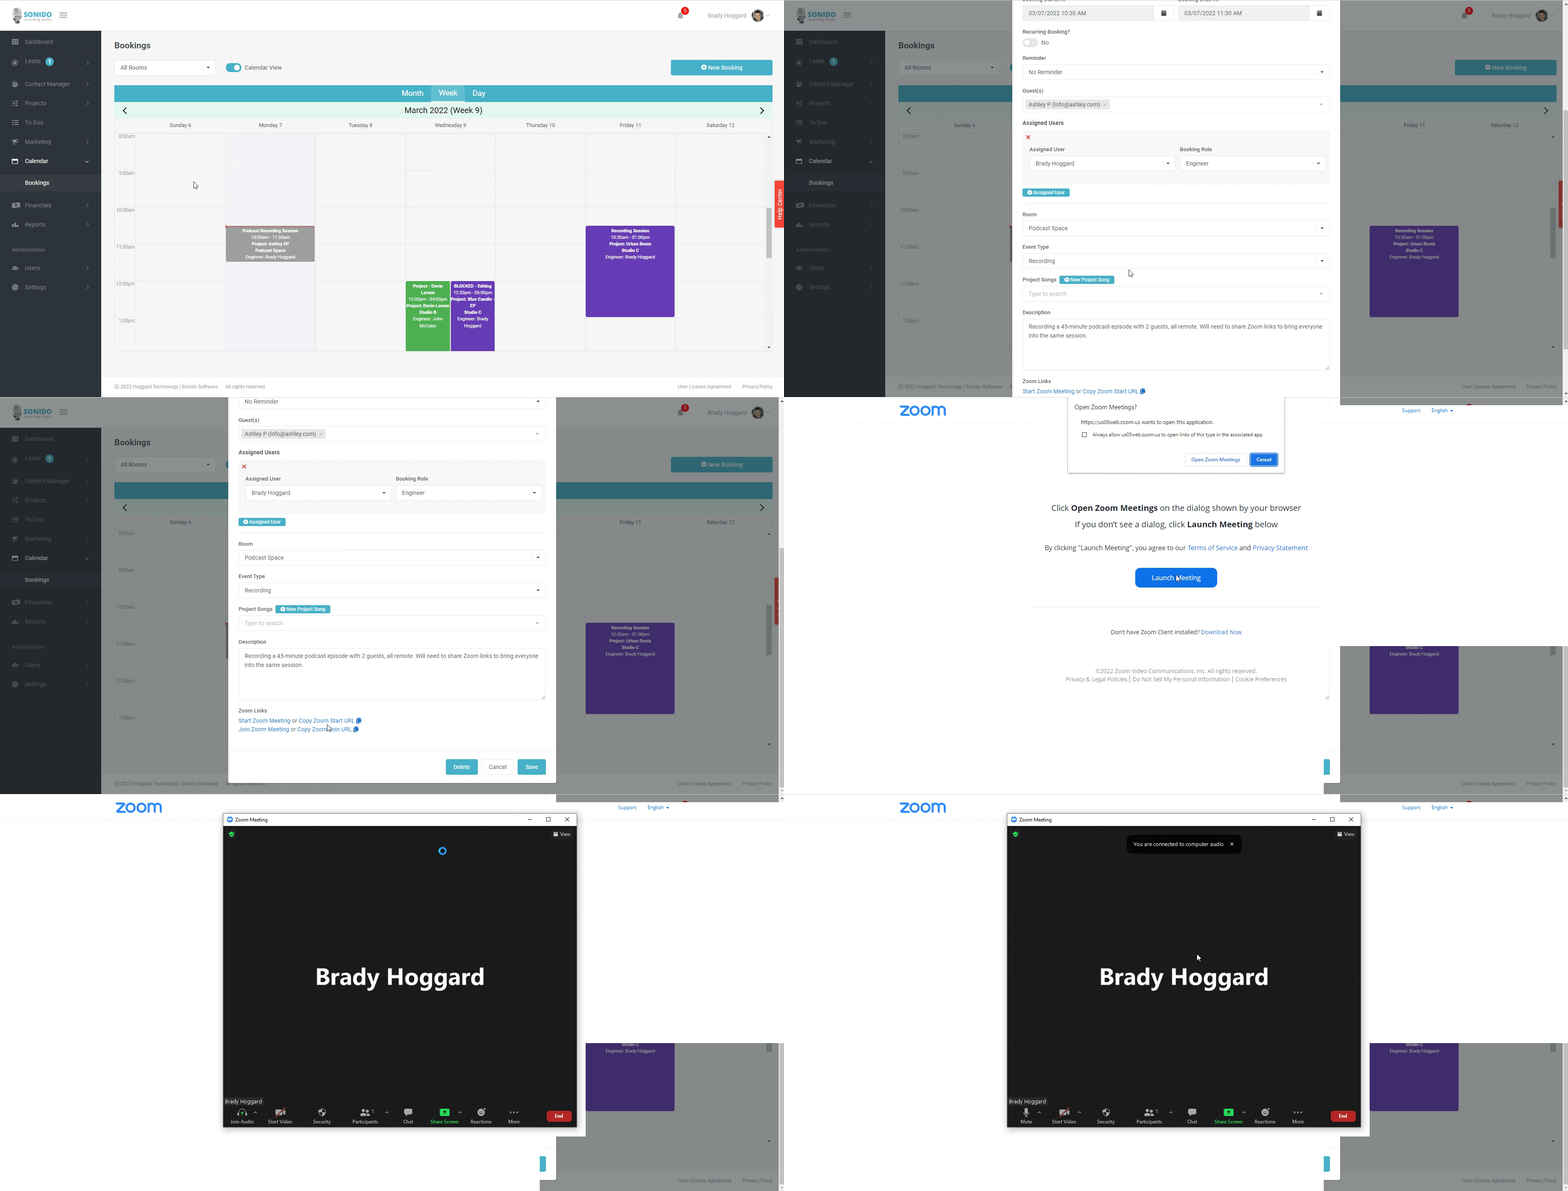
After completing the setup of the Zoom integration, every new calendar booking within Sonido will now have Zoom links connected as a reference. After saving a new booking, if you click on the booking you will see the attached Zoom meeting links at the bottom of the booking dialog.

Due to the current limitations of the Zoom Integration, these links will display on every booking - there is not a current option to add Zoom links to individual bookings.
Comments
0 comments
Please sign in to leave a comment.